When you’re ready to send out personalized postcards, letters, or envelopes, you’ll simply send us your file, and Dave’s team will do the rest!
How will Dave use my spreadsheet and print file to Create a Mail Merge?
Our experts will use your spreadsheet (with recipient details) and your print design file to create a custom mail merge in Adobe InDesign. This process combines data from the spreadsheet with your design, creating a unique mailer for each recipient. Here’s a step-by-step look at how they’ll make it happen.
1. Reviewing Your Files
First, we will check both the spreadsheet and PDF print files to make sure they’re ready for a mail merge:
- Spreadsheet: Typically in .CSV or .XLSX format, with clearly labeled columns like “First Name,” “Last Name,” “Address,” etc.
- PDF Print File: The design may need to be converted to an InDesign template (.INDD file) if it was created as a PDF, or our graphics team might choose to recreate parts of it in InDesign for easier merging.
2. Converting the PDF to an InDesign-compatible format
If your postcard design is currently a PDF, the printing team might convert it into an editable InDesign file. This conversion allows them to insert and align data placeholders directly within the template, ensuring each printed piece looks polished. They may:
- Import the PDF into InDesign or re-create it within InDesign.
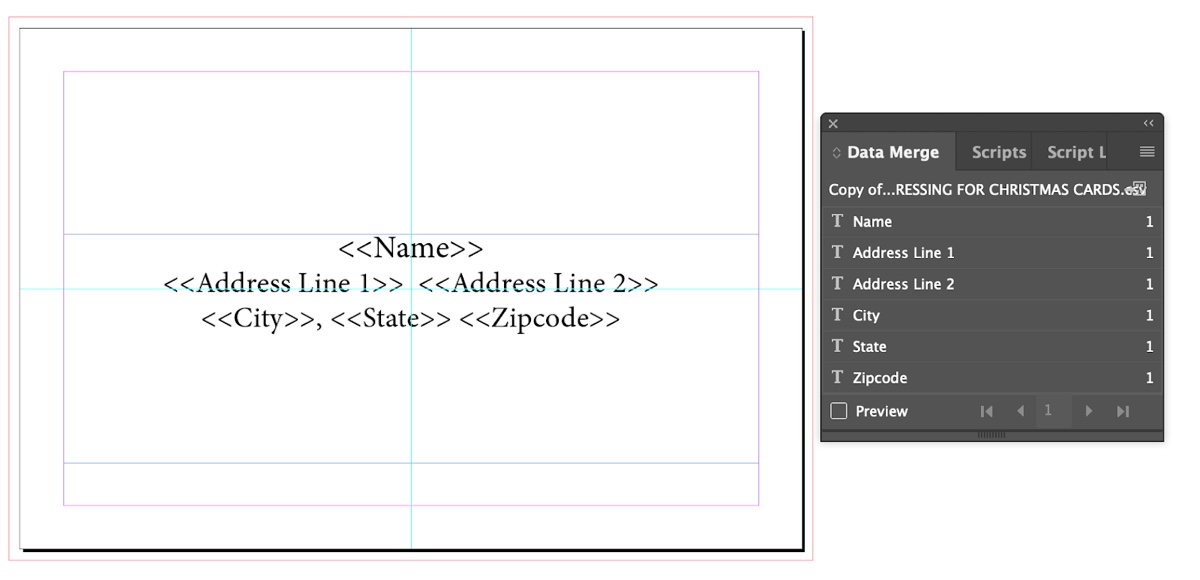
- Add placeholders for the data fields (e.g., recipient name and address) that need to be personalized.
3. Setting up the data merge in InDesign
Once the PDF design is ready in InDesign, Dave’s team will:
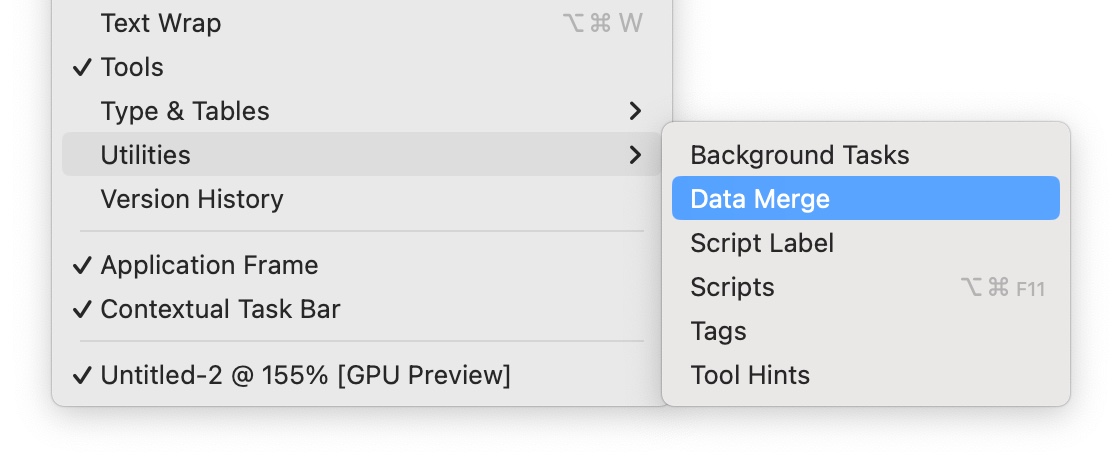
- Open the Data Merge panel in InDesign (found under Window > Utilities > Data Merge).
- Import the spreadsheet as the data source. Each column header in the spreadsheet becomes a “data field” that can be mapped to the print design.
- Map each data field to a specific location on the template, like a recipient’s name or address area.
4. Placing Data Fields in the Template
The company will now position each data field in the postcard template. For instance:
- Name Field: Placed on the postcard, letter or envelope wherever you want the recipient’s name to appear.
- Address Fields: Arranged in the address area of the postcard, with separate fields for Street, City, State, and Zip Code if needed.
These fields are placeholders that InDesign will replace with each recipient’s information during the merge.
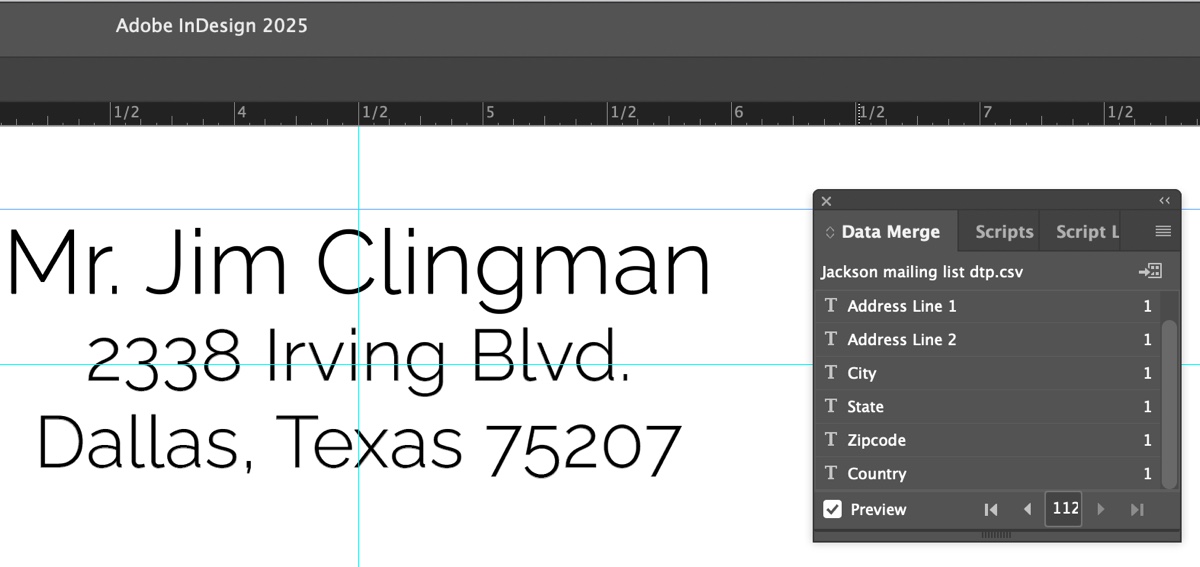
5. Previewing the Mail Merge

- The correct data appears in each field (e.g., each recipient’s name and address).
- Text fits well within each placeholder area and isn’t cut off.
Previewing allows for quick adjustments to ensure a clean, professional look on each postcard.
6. Generating the Merged Postcards
Once everything is in place, the company will use InDesign’s Data Merge to produce a unique postcard file for each entry in your spreadsheet. They can export these merged postcards as:

- A multi-page PDF: Each page represents a personalized postcard, ready for printing.
- Individual files, if needed, for further processing or to meet postal regulations.
7. Printing and Mailing
After creating the merged file, the printing company will print and prepare the postcards for mailing. Each card will feature personalized details aligned with your original design, giving every recipient a unique touch.
Tips for a Smooth Mail Merge Process
To ensure the process goes smoothly, here are a few tips for preparing your files:
- Ensure Accurate Data: Double-check that your spreadsheet has no empty fields or typos, as these could cause issues during the merge.
- Provide High-Resolution Files: For the best print quality, make sure your PDF design includes high-resolution images and graphics.
- Include Clear Labeling: Make sure the columns in your spreadsheet are clearly labeled so the printing company can easily identify where each piece of data should go.
By using Adobe InDesign’s powerful data merge features, your printing company can efficiently personalize each postcard, creating a customized mailing experience for every recipient. Whether you’re sharing an offer or a special message, this workflow ensures your campaign reaches each recipient exactly as intended.

