Dallas Printing Services – Preparing Print Ready Files
PREPARING PRINT READY FILES
Preparing files to send to Dave is not rocket science. There are a few things that will help us with printing your order and having the final prints come out just the way you envisioned.
How to Add Printer’s Bleeds to Your Artwork Files.
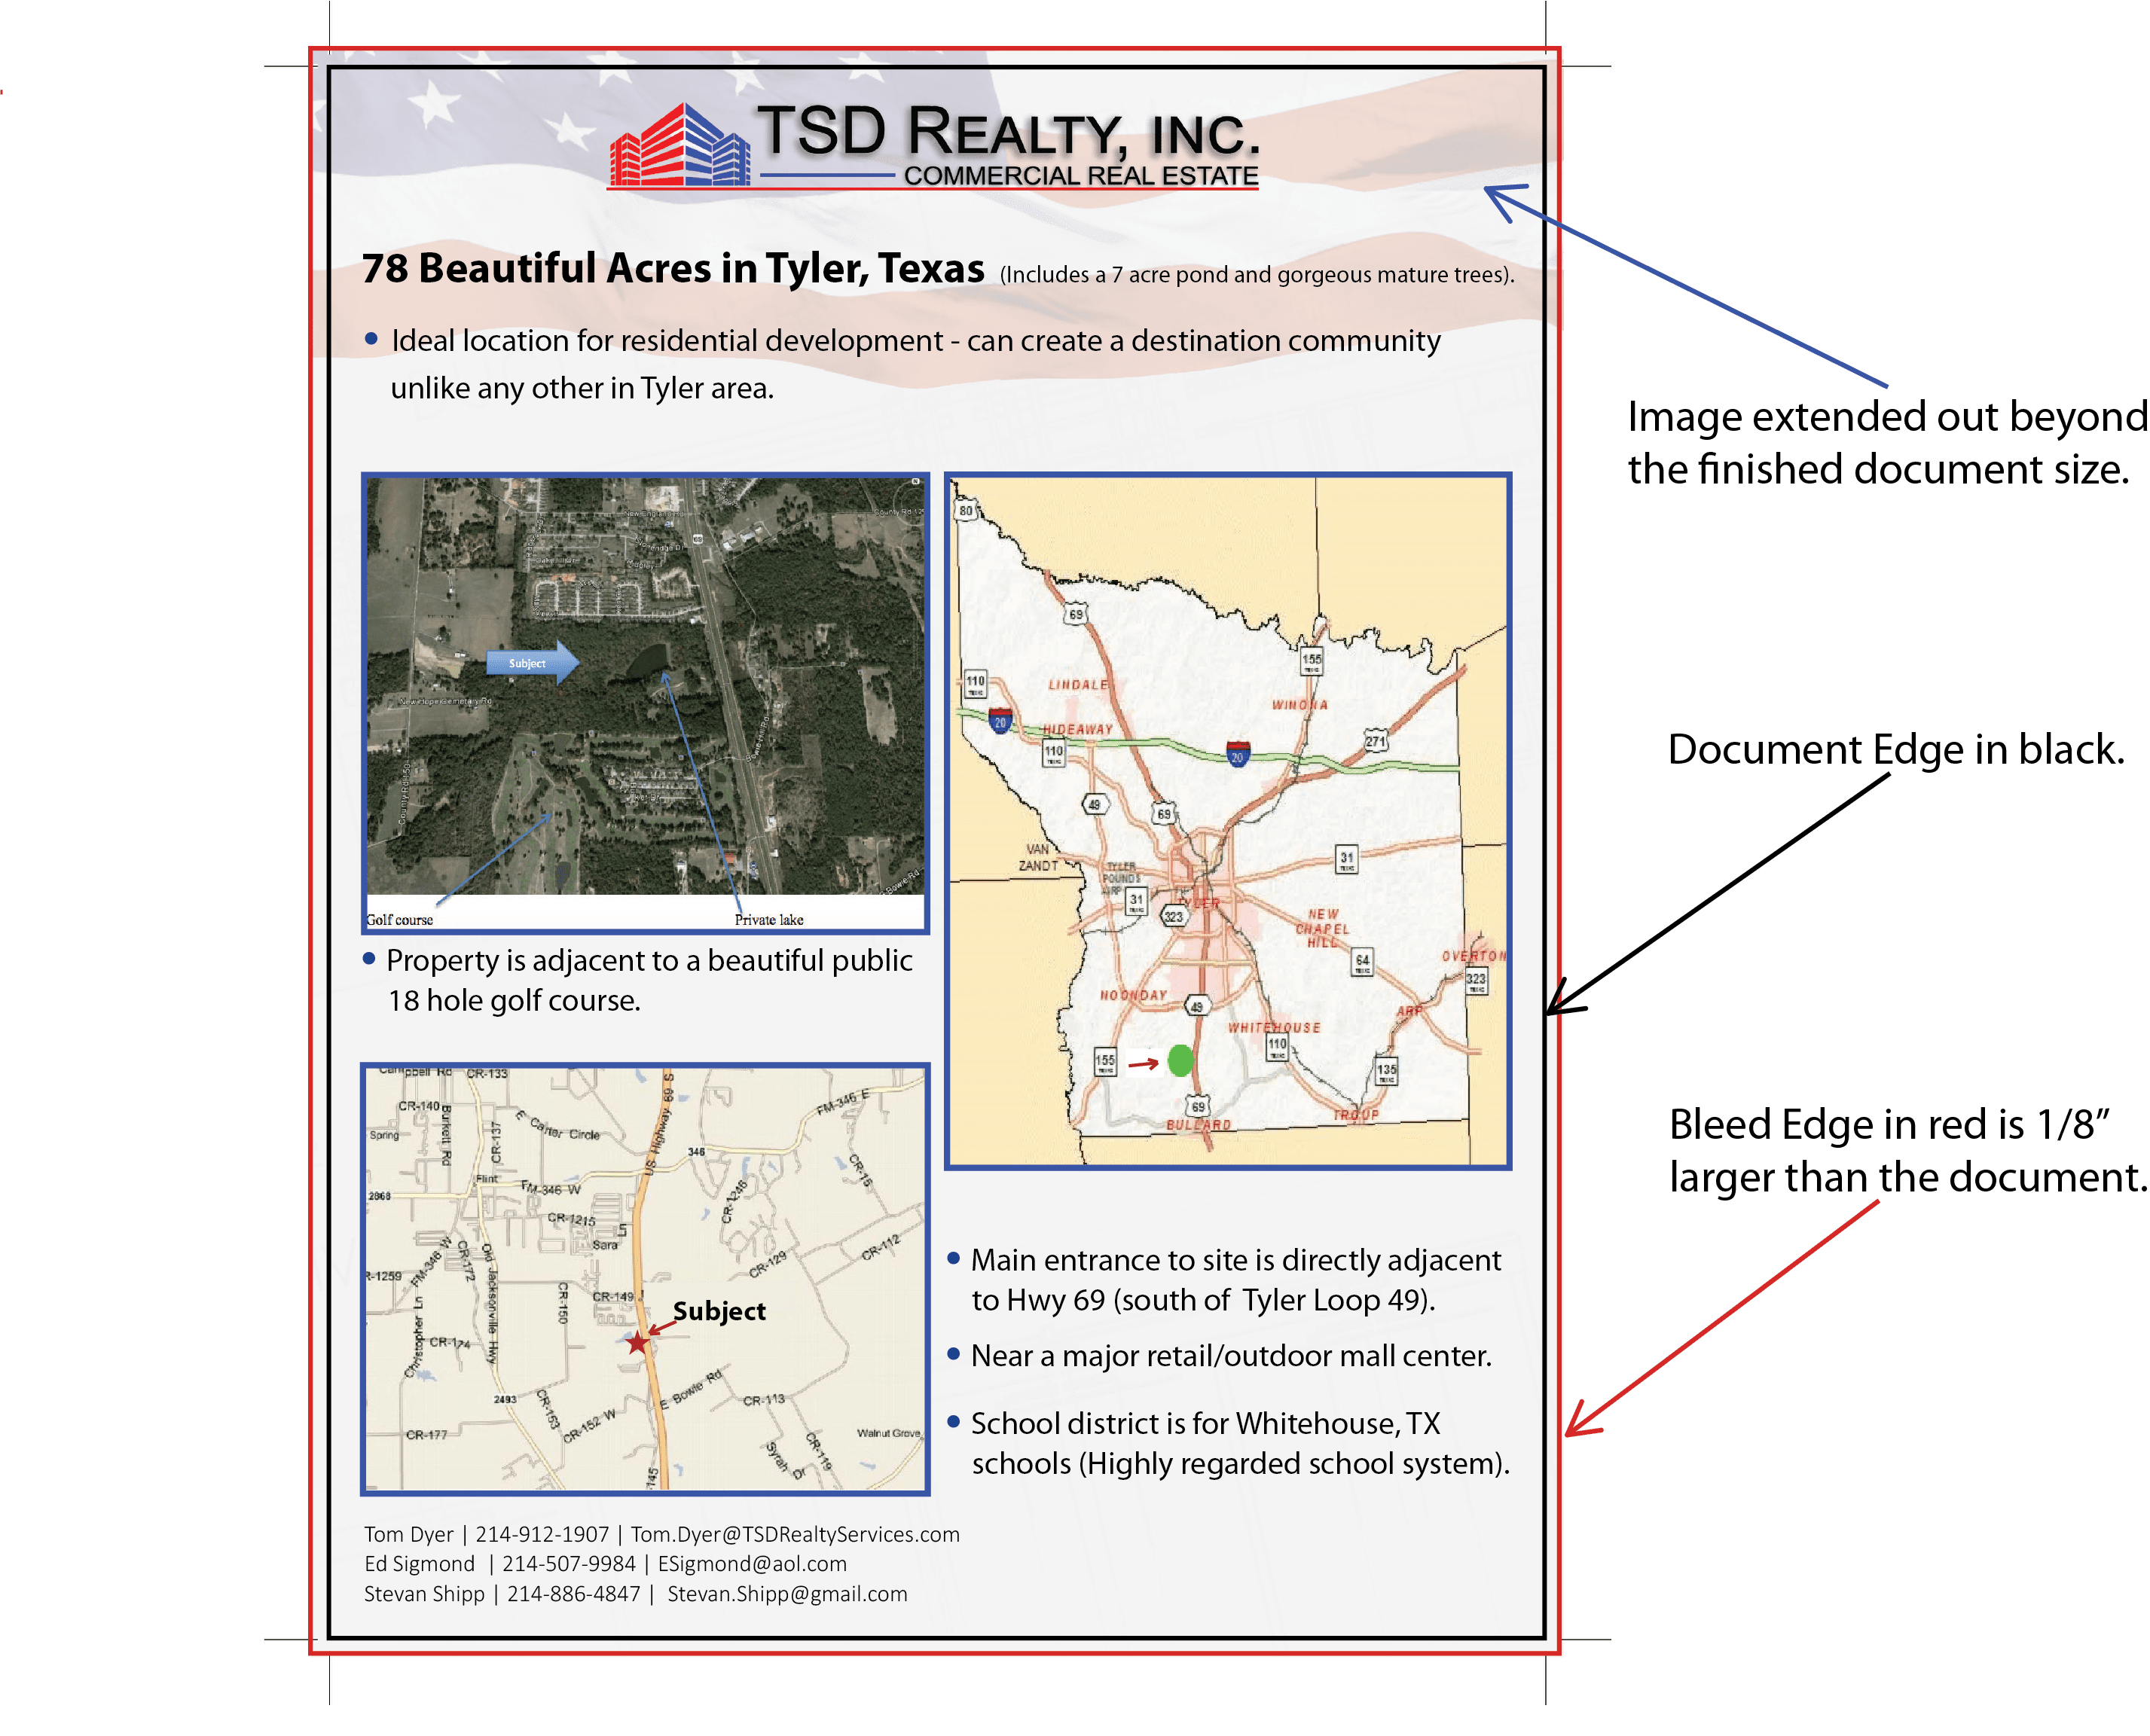
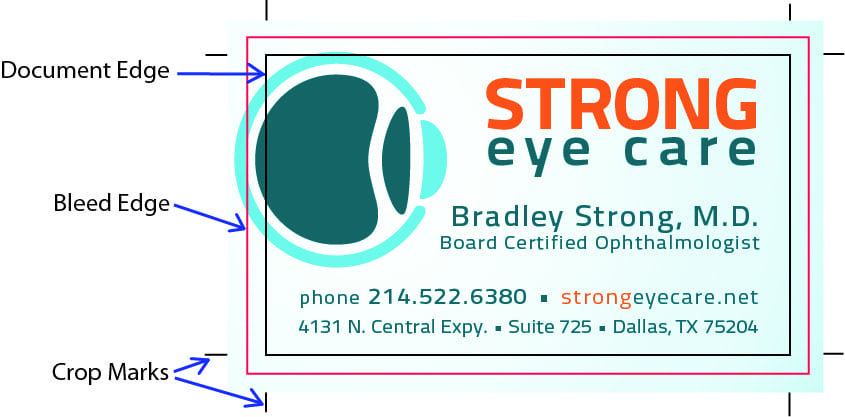
One of the most common mistakes made on print-ready files is the lack of “bleeds” added to the artwork for the best possible printed product. When a printer prints a file, the printer’s equipment requires a certain amount of margin space around the finished artwork. If you want your image(s) to reach the edge of the paper we need an additional margin area called “printer’s bleeds”. To accomplish this correctly, you must establish margins of the image to go beyond the edge (cut line) where the document will be cut after printing. Not establishing “printer’s bleeds” results in your product having white space around the edges and that white area may not be what you desire.

| EXAMPLE: | You have an 8.5″ x 11″ flyer and you want the images (or background) to meet the edge of the document. |
|---|
| STEP 1: | Enlarge the images and background by .125″ on each side. Your finished document will be 8.75″ x 11.25″. |
|---|
| STEP 2: | Your flyer will be printed on a sheet larger than 8.75″ x 11.25″ and professionally cut down to 8.5″ x 11″ resulting in a perfectly printed flyer. |
|---|
How to add crop marks to your artwork files.
Remember to save your artwork file with crop marks so that we know exactly where to cut your professional-looking product. We generally don’t need all the “printers marks” which include color bars etc., just the crops with the bleeds extended so choose that setting when saving your work.
Please call us with any questions! Our number is 214-630-4017. Our employees have decades of experience and are always happy to assist!
